
Last Updated: November 1, 2026
Quick Summary
To create authentic brand photography, start by defining your brand identity, then build a style guide and a shot list mapped to each channel before you shoot. Use real people, your actual space, and natural light, and direct subjects with tasks rather than poses so images never look staged.
- Answer five brand identity questions before you plan a single shot.
- A brand photography style guide locks in colors, lighting, composition, and editing tones.
- Build your shot list in three passes: must-have, channel, then stretch.
- Window light is soft, flattering, and free; angle subjects toward it.
- Give people a task, not a pose, to avoid stiff, staged images.
Table of Contents
- Why Authentic Brand Photography Beats Polished Stock Images
- Step 1: Define Your Brand Identity Before You Pick Up a Camera
- Step 2: Build a Brand Photography Style Guide
- Step 3: Write a Brand Photography Shot List That Covers Every Use Case
- Step 4: Set Up a Budget-Friendly Shoot Without Sacrificing Quality
- Step 5: Direct Real People So Shots Don’t Look Staged
- Frequently Asked Questions
Why Authentic Brand Photography Beats Polished Stock Images
Buyers can spot a stock photo in half a second. The perfect smile, the generic office, the handshake that means nothing. And once they spot it, they stop trusting the page.
Authentic brand photography is imagery of real people, real spaces, and real work, shot with intention so it matches your brand identity. At HillaryMoorePhotography, we build visual narratives for executives, business owners, and creative teams, and the lesson never changes.
What Makes an Image Feel Authentic
Authenticity is not about a messy desk or a candid blur. It is a set of visual choices that line up with who you actually are.
- Real people from your team, not models
- Your actual space, with your lighting and your clutter
- Natural expressions caught mid-sentence, not posed
The Nielsen Norman Group’s research on image trust backs this up: users judge credibility from visuals fast, and generic imagery reads as filler.
Step 1: Define Your Brand Identity Before You Pick Up a Camera
Start with strategy, not a camera. Brand identity is the set of values, personality traits, and messages that make your business recognizable, and every photo should trace back to it. Skip this step and you get pretty images that fight each other.
Questions That Reveal Your Visual Identity
Answer these before you plan a single shot:
- What three words describe our brand personality?
- Who is our target audience, and what do they need to feel?
- What do we want a viewer to understand in five seconds?
- Which emotions are off-limits for us?
- What do our best-performing images have in common?
If you want to see how a photographer works through this discovery, review our photography approach to understand the process before you commit.
Step 2: Build a Brand Photography Style Guide
A brand photography style guide is a short document that locks in how your images look so every shoot, and every photographer, produces the same visual style.
Keep it to a few pages covering:
- Brand colors and how they appear in sets and props
- Lighting preferences, such as soft natural light versus crisp studio light
- Composition rules, like centered versus off-center framing
This guide is also how you brief freelancers and keep a growing library coherent. For a deeper look at why consistent visuals pay off, see professional photography for small business branding.
Step 3: Write a Brand Photography Shot List That Covers Every Use Case
A brand photography shot list is your plan for every image you need, grouped by where it will live. Without one, you shoot randomly and leave with gaps. The strongest shot lists go one step further than most guides: they map each image to a specific channel, crop, and file format before the shoot, so the library is usable the day it is delivered.
Photo Types Every Brand Library Needs
| Photo Type | Where It Lives | What It Shows |
|---|---|---|
| Portrait | Website, LinkedIn, speaker bios | Team and leadership faces |
| Lifestyle | Social media, ads, email | Real work in real settings |
| Product | Ecommerce, landing pages | Offerings in use |
| Behind-the-scenes | Stories, culture pages, recruiting | Process and people |
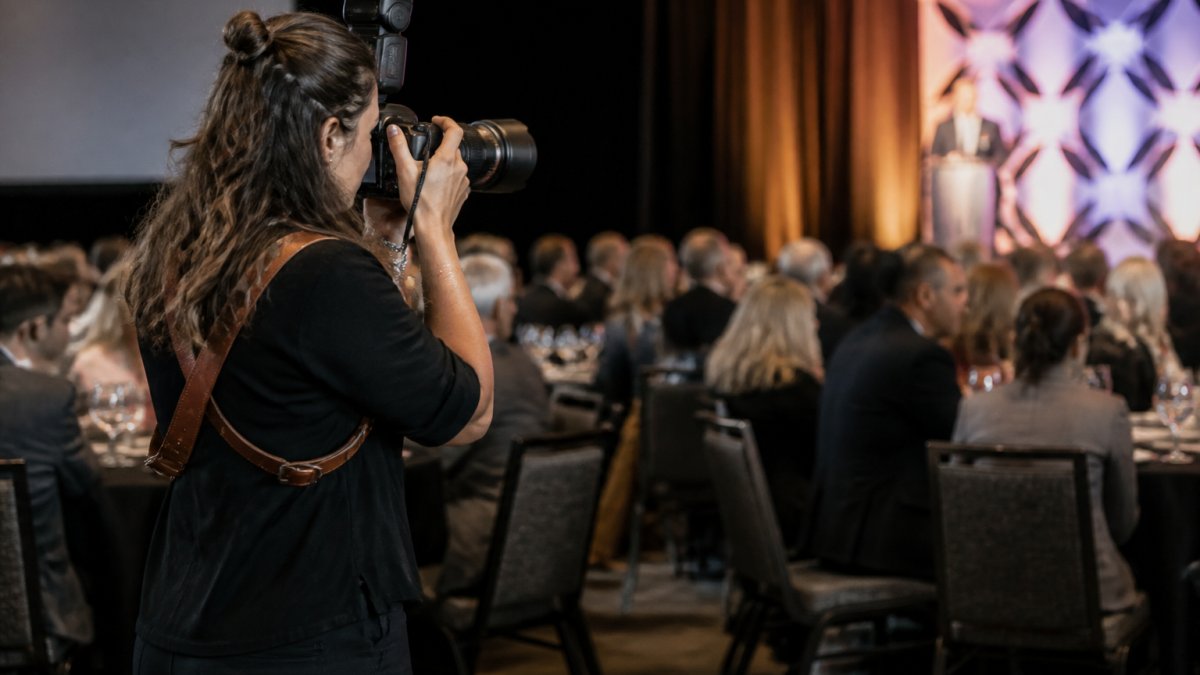
| Event | Recaps, press, award and recognition pages | Gatherings and milestones |
| Detail and texture | Backgrounds, section dividers | Space, tools, materials |
Map Every Shot to a Channel and Crop
Plan each shot around its channel, not the other way around. A single portrait may need a square crop for social, a 16:9 crop for a website hero, and a vertical crop for stories. Note the required aspect ratio, resolution, and file format next to each line on the shot list. A common pattern is to shoot slightly wider than the final crop so you have room to reframe without losing heads or hands.
- Website hero: wide horizontal, room for headline text on one side
- Social feed: square or 4:5 vertical, subject centered
- Email header: wide and short, safe zone in the middle
Build the List in Three Passes
- Must-have pass: the images the site cannot launch without.
- Channel pass: add crops and formats for each destination.
- Stretch pass: the nice-to-have moments you shoot only if time allows.
This ordering protects the shoot day. If you run long, you still leave with the images that matter.
Select, Edit, and Deliver Without Flattening Real Skin Tones
Editing consistency is where many libraries fall apart. Match white balance, exposure, and contrast across the set, but resist the urge to apply one heavy preset to every image. A common mistake is a warm filter that looks cohesive on light skin and muddy on deeper skin tones. Edit for consistency in tone and mood, not uniformity in color.
- Cull in passes: reject technical failures first, then pick by use case
- Edit in batches by scene and lighting condition, not by individual photo
- Check skin tones on a calibrated display before export
Alt text should describe what the image shows and why it matters, not repeat the caption. “Two colleagues reviewing a printed layout at a standing desk” beats “image1.jpg.” Keep text over images high-contrast so it stays readable for low-vision visitors.
Name, Store, and Refresh the Library
A shot list is only as good as the library it feeds. Use a consistent file-naming convention (date, scene, subject, crop), store originals in one governed location, and schedule a refresh so portraits and team pages do not go stale.
If you are not sure how candid, in-context images differ from posed ones, read what lifestyle photography is and how it helps your business before you finalize the list.
Step 4: Set Up a Budget-Friendly Shoot Without Sacrificing Quality
You do not need a studio full of gear. A tight budget still produces strong small business brand photography if you spend on the right things. This section covers the DIY path most guides skip: what a phone camera can actually deliver, how to shape natural light, and when paying a professional is the smarter call.
Start With the Camera You Already Own
Lock focus and exposure, shoot in the highest resolution available, and avoid digital zoom, which degrades quality fast. A tripod or a stable surface helps for portraits and product shots.
- Use window light instead of renting lighting
- Shoot in your real workspace instead of a rented set
- Borrow props from your own office
Shape Natural Light for Free
Window light is soft, flattering, and free. Position the subject at an angle to the window rather than directly in front of it, and use a white wall or a sheet of foam board as a fill reflector on the shadow side. A sheer curtain diffuses harsh midday sun. Avoid mixing window light with overhead office lighting, which casts uneven color.
Do not shoot against a bright window without a fill source. The subject will silhouette and the image will be unusable for a portrait or speaker page.
Low-Cost Backdrops and Props
A seamless paper roll, a painted wall, or a clean corner of your actual space all work as a backdrop. Pull props from what you already use: laptops, notebooks, plants, product samples, award trophies. Real objects read as authentic; rented set dressing often reads as generic.
Know When to Bring In a Professional
DIY has limits. Bring in a professional when the images carry real stakes: executive portraits, award and recognition events, product launches, and anything that will run in press or on a stage screen. Those settings often involve low light, moving subjects, and tight timing, which is where a professional session is most useful.
Spend on the images that represent your brand at its most visible moments, and DIY the everyday content that fills the feed. That split keeps quality high without stretching the budget.
A common mistake is overbuying gear before you know your visual style. Lock the style guide first, then spend. To weigh what a shoot involves and what fits your needs, view the service offerings on our site.
Step 5: Direct Real People So Shots Don’t Look Staged
The best way to kill a fake look is to give people something real to do. Staged images fail because the subject is performing for the camera.

Try these directing moves:
- Give a task, not a pose (“walk me through your morning”)
- Ask a real question and shoot the answer
- Let people move and talk between frames
Watch out: over-directing is the fastest route to stiff, cheesy images. When you are ready to book a shoot with real people, check pricing and get in touch to plan the details.
Frequently Asked Questions
What makes brand photography feel authentic?
Authentic brand photography feels real because it captures genuine moments, expressions, and environments rather than posed setups. The key is directing people into natural actions, like working at a desk or talking with a colleague, and shooting in spaces that actually belong to the business. Consistent lighting, real props, and a clear visual style guide keep the images cohesive while still looking unposed. When viewers recognize the people and places, they trust the brand more.
What should be included in a brand photography shot list?
A strong brand photography shot list covers every channel you publish on. Include portrait photography for team pages and social profiles, lifestyle photography showing real work moments, product photography for ecommerce and promotions, behind-the-scenes shots for social media, and detail images of tools or spaces. Note orientation (horizontal for websites, vertical for stories), required props, and the people involved. Build the list around your actual content calendar so every image has a purpose before the shoot begins.
Can you create authentic brand photos with a smartphone?
Yes. A modern smartphone with natural light, a clean background, and thoughtful composition can produce authentic brand photography for small business use. Use manual mode if available to control exposure and ISO, shoot near windows, and avoid digital zoom. The bigger investment is planning: a shot list, a style guide, and consistent editing make phone photos look cohesive. For hero images, executive headshots, or print campaigns, a professional session is a practical option for consistent quality across a full library.
How often should a business update its brand photography?
Refresh your core brand photography every 12 to 18 months, or sooner if your team, office, products, or visual identity changes. Seasonal campaigns and product launches need new images on their own schedule. Keep a simple image audit each quarter: flag photos with outdated branding, low engagement, or missing accessibility alt text. Consistent updates prevent the mismatched look that comes from mixing images shot years apart, and they keep your website and social media feeling current.
Building authentic brand photography takes strategy, a style guide, a solid shot list, and direction that lets real people be themselves. That is exactly the work HillaryMoorePhotography does, with over 15 years of conceptual, narrative-driven photography and videography for executives, business owners, and teams. Get started with HillaryMoorePhotography and build a visual library that tells your story the way it deserves.





0 Comments